Steps to how to use the software
Proceed to given points to know the working of software in detail.
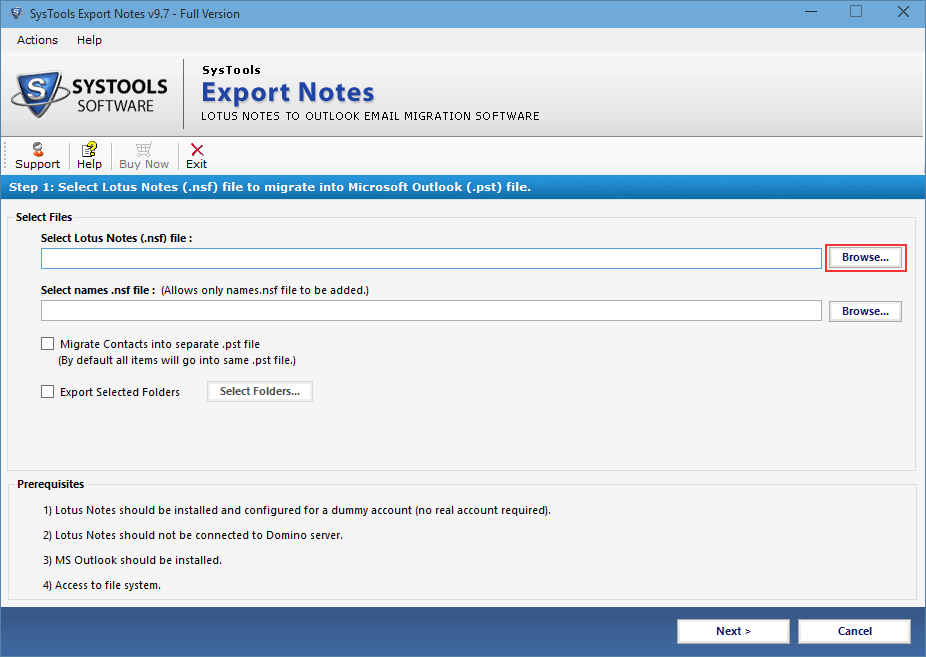
1. Install software and launch it.

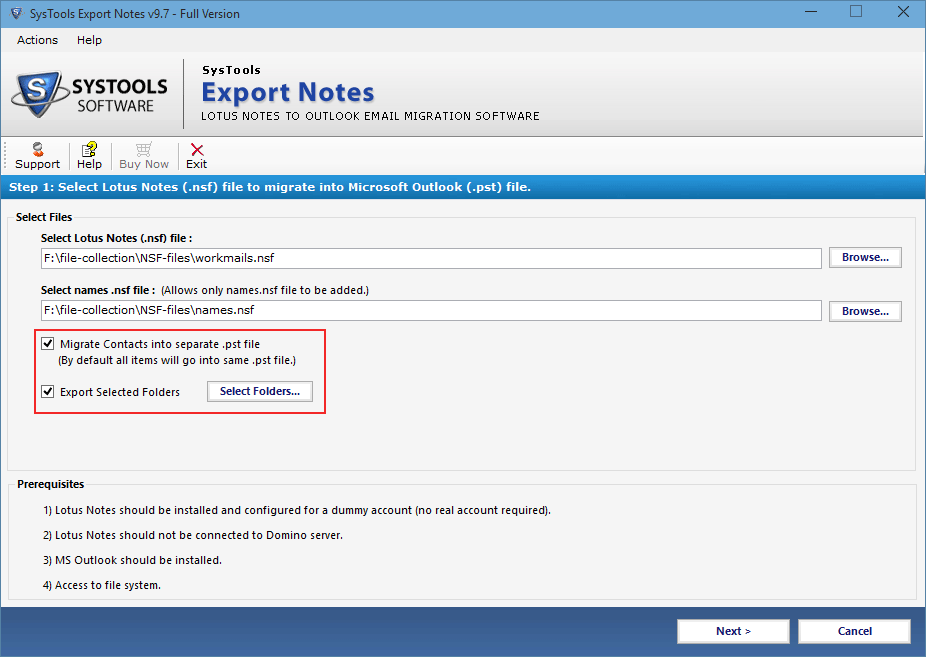
2. Click on Browse button to loacte the files on your machine
3. Browse Contact nsf file.
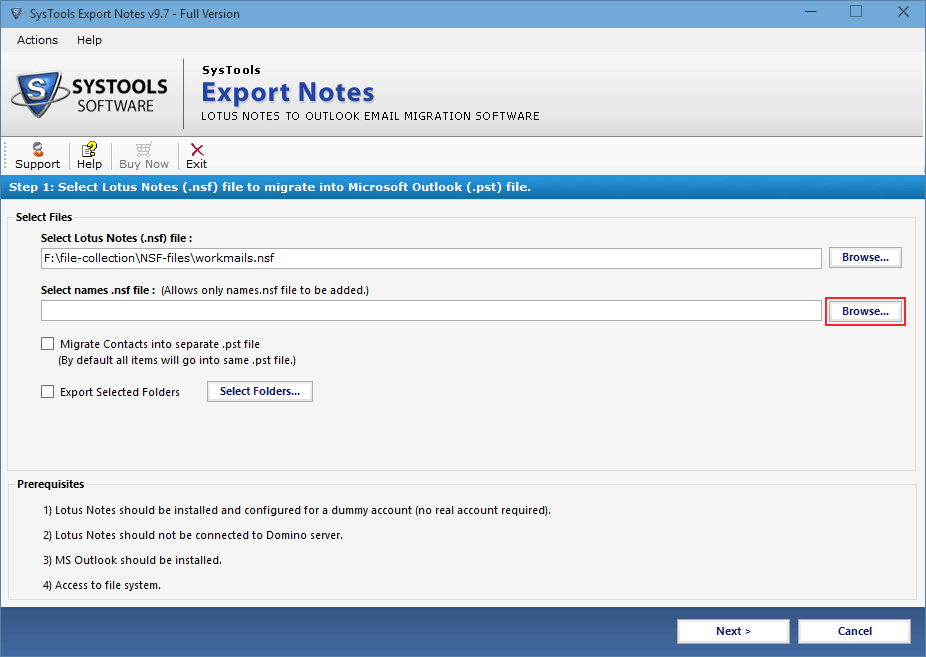
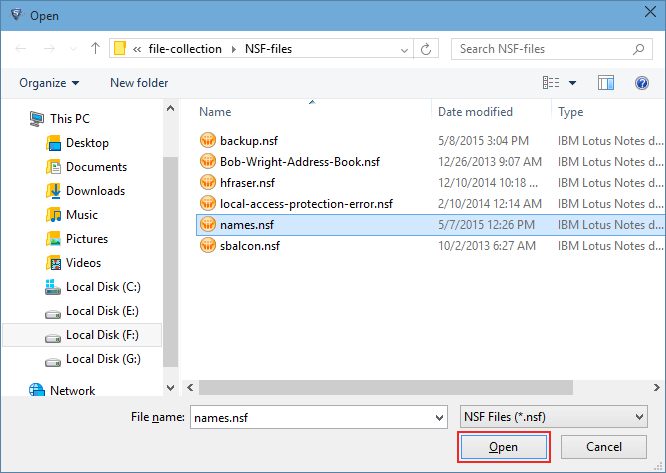
4. Open names.nsf Contact nsf file .
5. If you want to migrate contact nsf file to separate pst file check on Migrate Contacts into Single PST File"
If you want to export selected folder, check on Export Selected Folders and then click on Select folder button.
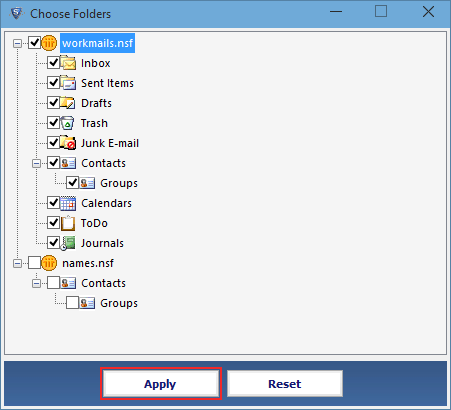
6. Screen shows list off folder, select required folder and click on Apply button.
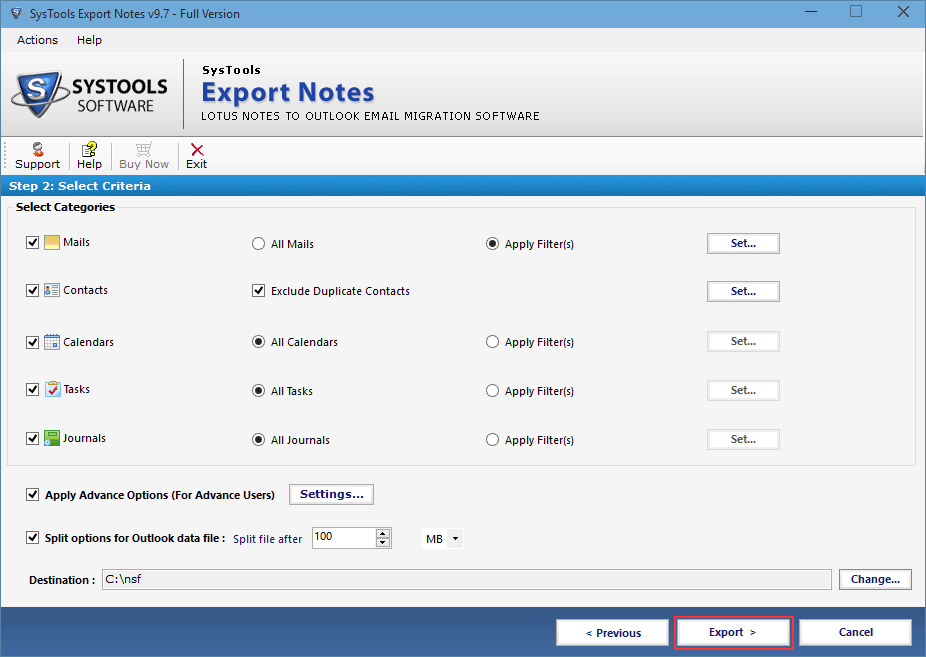
7. The Next Screen gives you criteria to select or apply filters on mails, calendars, contacts etc.
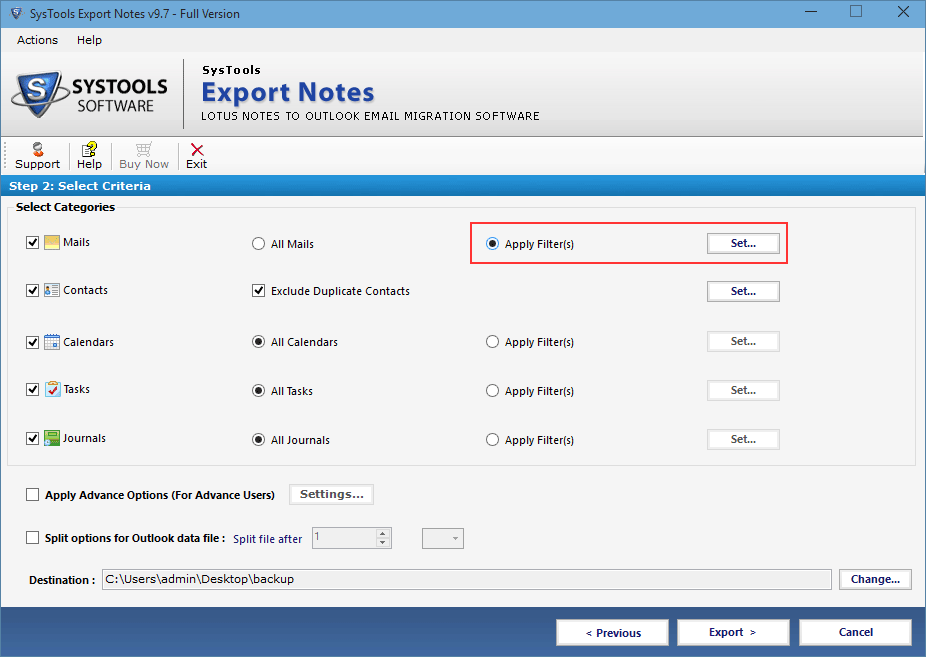
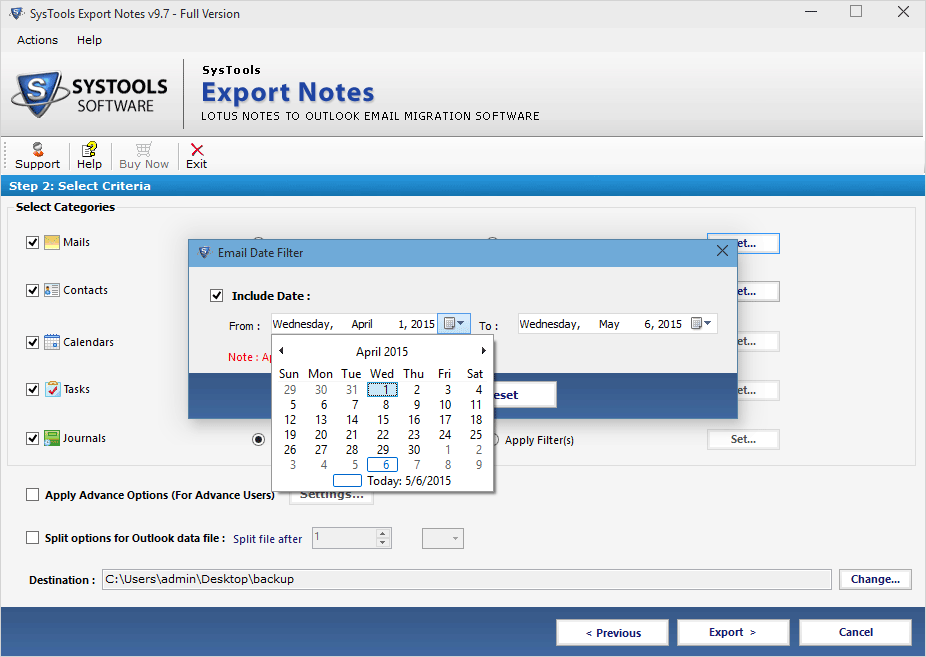
8. Date filter offers you to export emails which came during specified time interval.
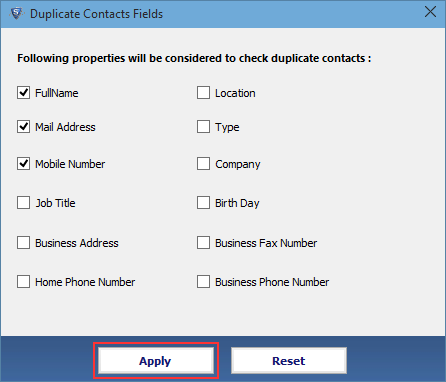
9. To eliminate duplicate contacts just check on Exclude Duplicate Contact option.
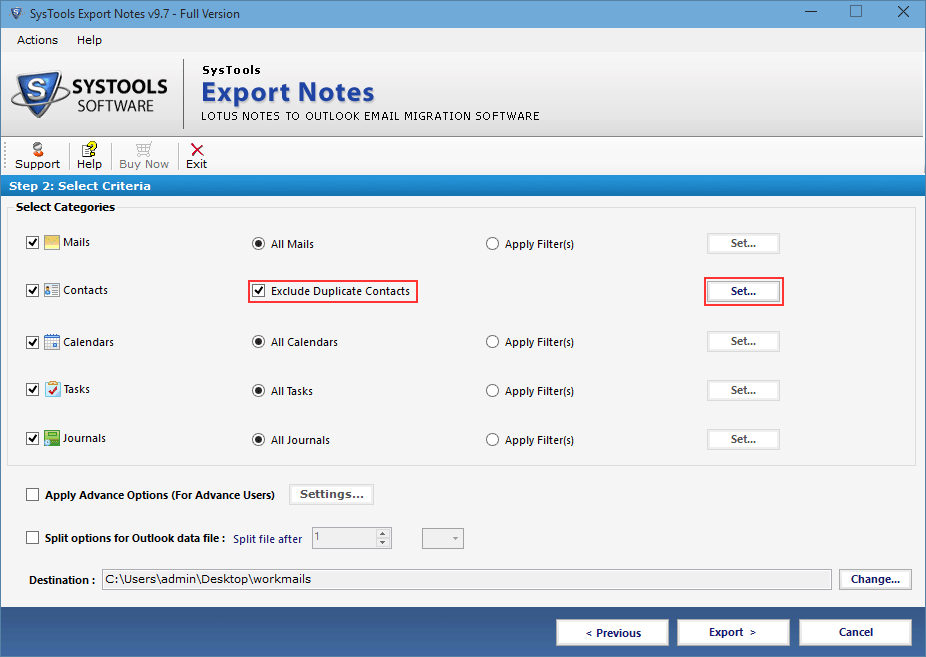
10. You can specify criteria to set Duplicacy of a Contact.
11. For advance setting check on Apply Advance options.
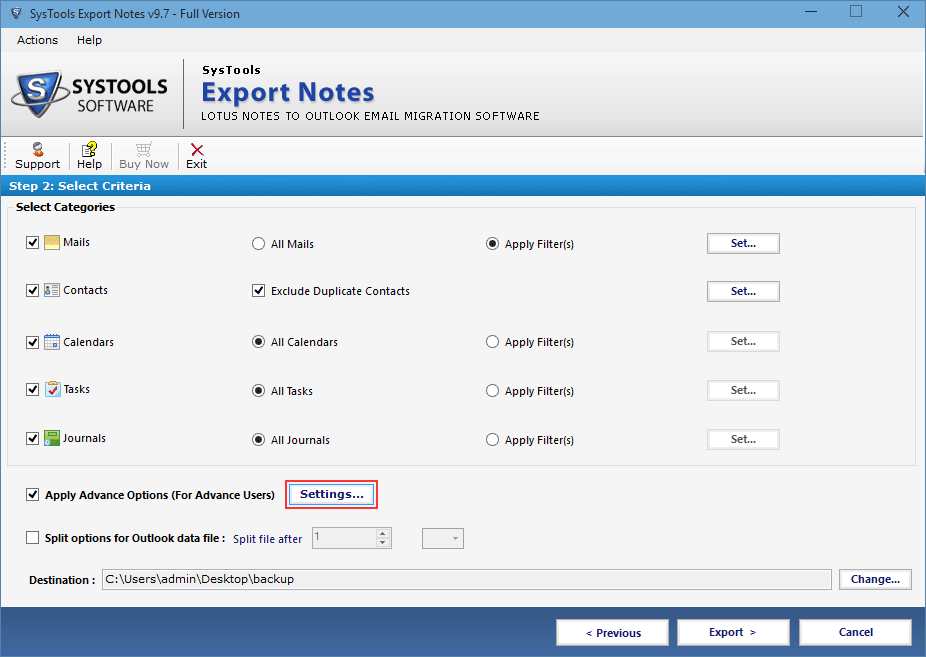
12. Select Advance setting options.
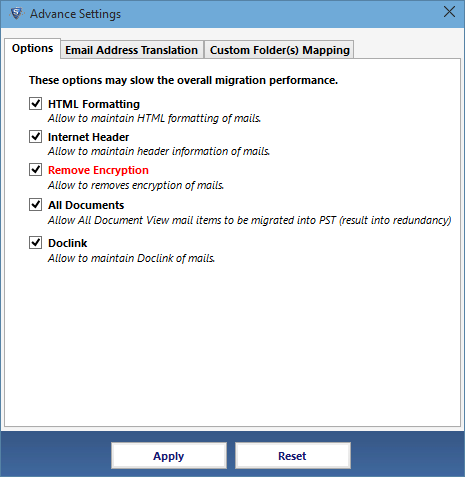
HTML format: Choose to reatin html format while in the process of conversion.
Internet Header: it maintains sent/receive email header.
Remove Encryption: Select to remove Encryption from mails.
All Documents: Allow you to migrate all Document View emails.
DocLinks: Allow you to Export mails retaining Document Links in mail.
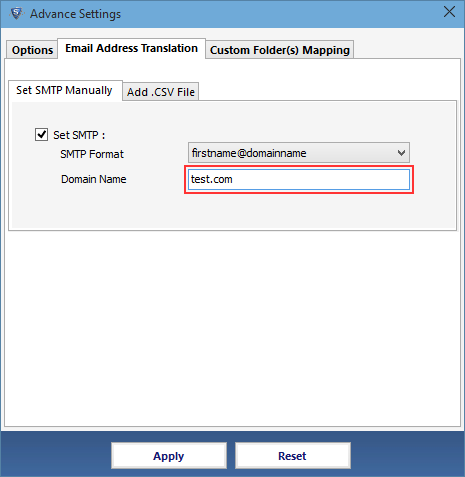
13. You can change canonical name in file of lotus notes to SMTP format of Outlook, select required naming convention.

14. Now Enter the domain name for SMTP format.
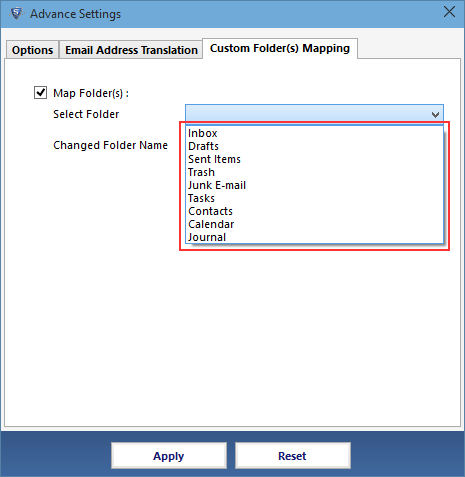
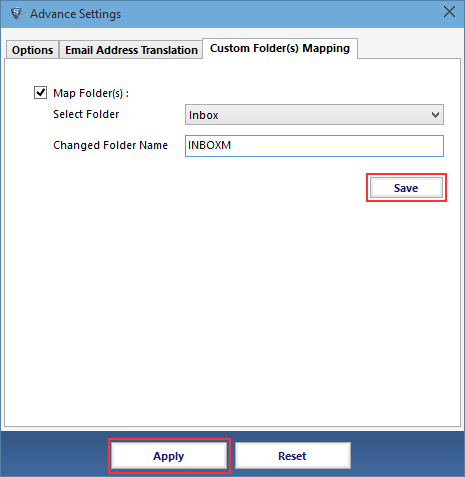
15. Choose Customer Folder(s) Mapping to map default generated Lotus notes folder into outlook default folder name.
16. Apply the settings, by clicking Apply button.
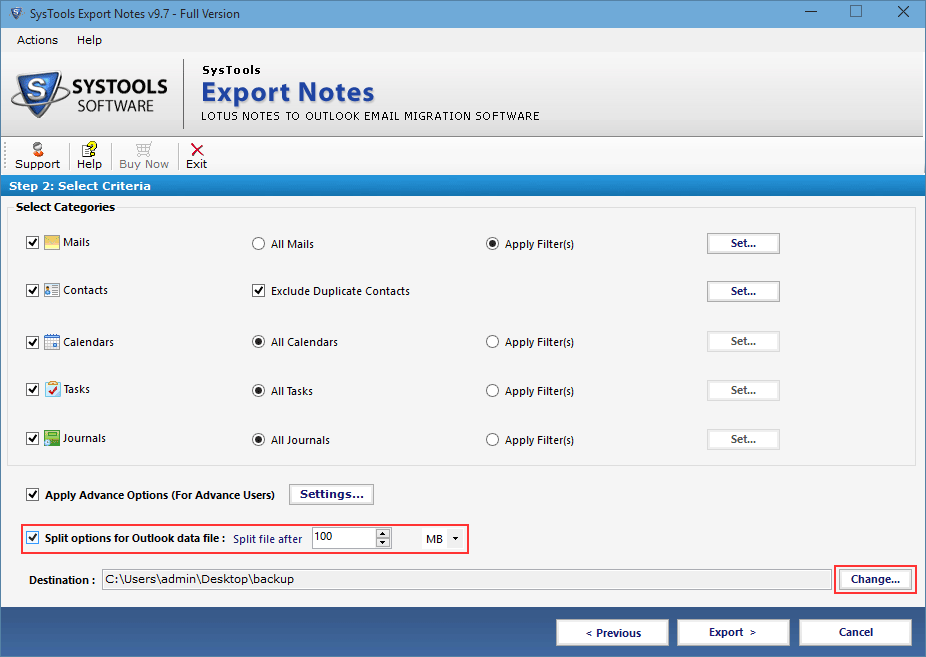
17. Check on Split option for Outlook files to split large PST file by size.
To change the default saving location click on Change button.
18. Now Click onExport button to start the process.
To change the default saving location click on Change button.
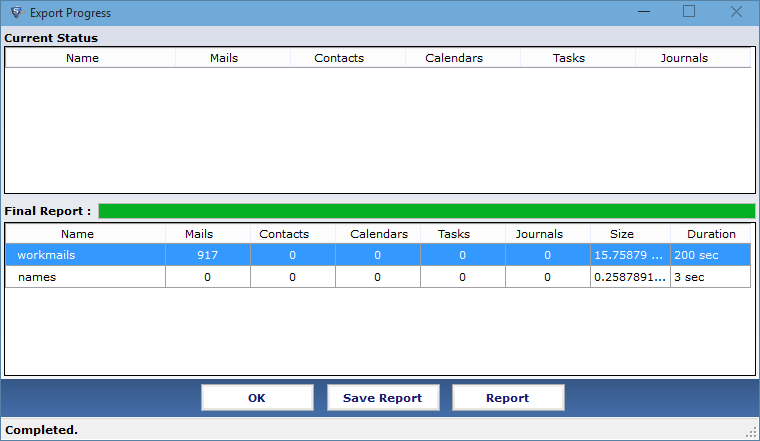
19. A report is generated at the end of process, you can save this report by clicking on Save Report button.
20. Open Outlook and browse the destination folder where you have saved your output file generated by the software, choose the file and open it.